JRE (Java Runtime) is required to run Java programs. To write and run Java programs, JDK (Java Development Kit), which includes JRE plus development tools (e.g. compiler and debugger) is needed. In other words, JRE is a subset of JDK. You should install JDK, which includes JRE, as you need both as a developer.
Below are the steps to install Java
Step 1: First uninstall the older version of JDK/JRE. Go to control panel and uninstall java.
We recommend that only the latest JDK be installed. Although it is possible to install multiple versions of JDK / JRE simultaneously.
Step 1: Install Java
Install Java in your system if not
installed. To Check Java is already installed in your system or not, Follow
below steps
1. Press Window + R keys
2. Type cmd & hit Enter.
3. In Command prompt: Type “java -version”
and Enter.
4. If the Java is already installed in your
system, it returns the java version (as seen below). If not, it shows as
invalid command.
 |
How to Download/install Java JDK
1. Go to L-ink. Click on JDK Download for Java JDK download.
2. Download Java JDK version as per your system configurations (32 bit or 64 bit).
3. Once the Java JDK download is complete, run the exe for install JDK. Click Next
4. Place this file here: C:\Program Files\Java
5. Follow the onscreen instructions in succeeding installation steps.
6. Once you install Java in windows, click Close.
7. Now, as mentioned in step1, check JAVA version in cmd window.
Step 2: Set
Environment Variables: Path and Class path
1. Press Window + R keys
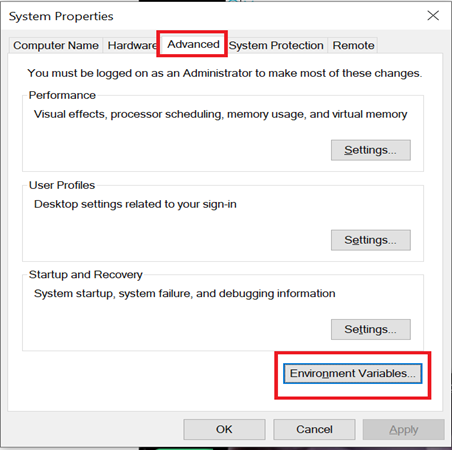
2. Type sysdm.cpl & hit Enter
3. Select “Advanced” tab
4. Select “Environment Variables” as seen in image.
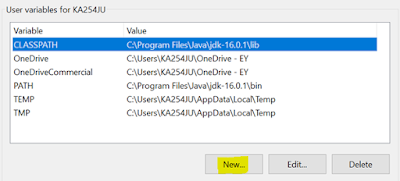
5. Click on new Button of User variables.
6. Type PATH in the Variable name.
7. Copy the path of bin folder which is installed in JDK folder.
8. Paste Path of bin folder in Variable value & Click on OK Button.
9. You can follow a similar process to set CLASSPATH, but in variable value copy the path of lib folder, instead of bin.
10. Go to command prompt and type javac command. If you see a screen like below, Java is installed.
11. Click on the Link to configure JAVA_HOME variable in system.
Step 3: Install Apache Maven
Click
on the Link to Download Maven.
1.
Follow
the link for steps to install Maven in system.
Step 4: Install Eclipse IDE/ IntelliJ
IDEA Community Edition
Install Eclipse IDE
Click
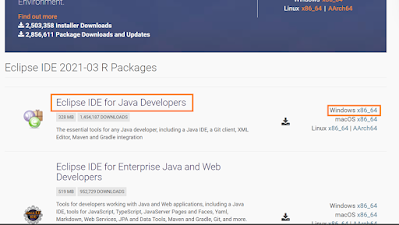
on the link to download Eclipse IDE , Be sure to choose correctly between Windows 32
Bit and 64 Bit versions
1.
In
a new window Click on “Download package” link.
2. Navigate to “Eclipse IDE For Java Devolepers”section and select Windows x86_64 or macOS x86_64 based on your system specifications
3.If you want to install eclipse with earlier versions choose required version under “MORE DOWNLOADS”
4. After selecting Windows x86_64 or macOS x86_64 based on you system type, you can download package by clicking “DOWNLOAD” button
5. Navigate to folder path where the downloaded files will store,extract files from zip file to req path(eg:- C:\Program Files (x86))
6. Open the extracted eclipse folder and double click on eclipse application to launch eclipse in you system
7. Once eclipse is launched,Create a Project->Package->Class
IntelliJ IDEA Community Edition
Open on the link to download the IntelliJ IDEA Community Edition and click on the download button under community version.
2. Navigate to folder path where the downloaded files will
store,
3. Open the .exe file to launch intelliJ in your system
Create
a new Java project
1. Launch IntelliJ IDEA.
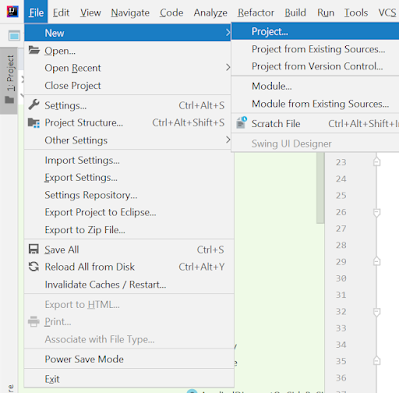
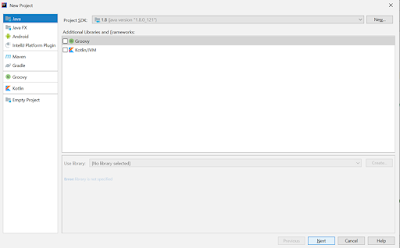
2. If the Welcome screen opens, click New Project.
Otherwise, from the main menu, select File | New |
Project.
3.From the list on the left, select the framework that you
want to use in your application.
Select java for our project
If the necessary JDK is already defined in IntelliJ IDEA,
select it from the Project SDK list.
If the JDK is installed on your computer, but not defined in
the IDE, select Add JDK and specify the path to the JDK home
directory
4.Click on Next
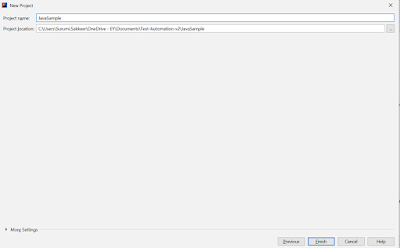
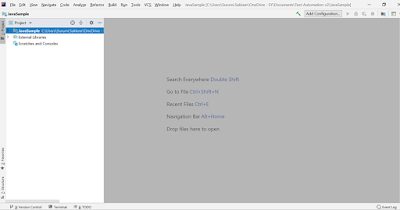
5.Enter a project name as show below and click Finish
Create a package
and a class
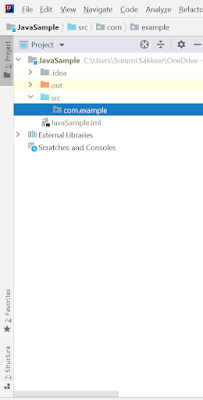
1.In the Project tool window, select
the src folder and select Package.
In the Name field, type com.example and press Enter.
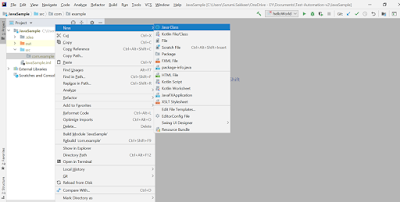
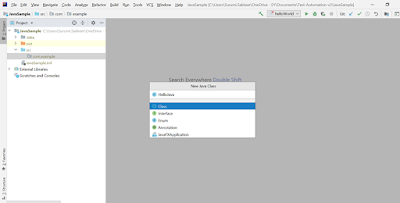
2.Right click on the package and select New-> Java Class and in the Name field, type HelloJava and press Enter
3.Copy the below code and paste in the HelloJava.java class and click Run icon at the right corner.
package com.example;
public class HelloJava {
public
static void main(String[] args) {
System.out.println("Happy
Learning");
}
}








No comments:
Post a Comment