Appium 2.0 Release and update - Part 1

 Appium info

Appium Desktop is unsupported, no longer maintained, and has known security vulnerabilities. It is advised not to use it at all. Use at your own risk.


appium 2.0


Is Appium deprecated?


AppiumDriver methods resetApp, launchApp and closeApp have been deprecated as they are going to be removed from future Appium versions. The following method can be helpful to launch App by using startActivity method and ResetApp by using clearApp and StartActivity methods


Migrating from Appium 1.x to Appium 2.x


Appium 2.0 is the most major new release of Appium in over 5 years.


Default server base path : 


With Appium 1.x, the server would accept commands by default on http://localhost:4723/wd/hub

With Appium 2.x, the default base path for the server is now /


Installing drivers during setup :


With Appium 1.x, all available drivers would be installed at the same time as the main Appium server

With Appium 2.x, This is no longer the case. Simply installing Appium 2.0, will install the Appium server only, but no drivers


How to install appium 2.x


 - npm install -g appium@next


To install the latest versions of the XCUITest and UiAutomator2 drivers, after installing Appium you would run the following commands:


 - appium driver install uiautomator2     # installs the latest driver version


 - appium driver install xcuitest@4.12.2  # installs a specific driver version


If you want to install appium with two drivers for you in one go


 - npm install --global appium --drivers=xcuitest,uiautomator2


if you get an installation or startup error. Please uninstall any existing Appium 1.x npm packages

 - npm uninstall -g appium


Drivers installation path

  With installed Appium 1.x, all available drivers would be installed in the path as /path/to/appium/node_modules. 


For example, appium-webdriveragent to build WebDriverAgent manually was /path/to/appium/node_modules/appium-xcuitest-driver/node_modules/appium-webdriveragent.


Part 2 continues

How to install java and set environment variables and create java project in intellij

JRE (Java Runtime) is required to run Java programs. To write and run Java programs, JDK (Java Development Kit), which includes JRE plus development tools (e.g. compiler and debugger) is needed. In other words, JRE is a subset of JDK. You should install JDK, which includes JRE, as you need both as a developer. 

Below are the steps to install Java 

Step 1: First uninstall the older version of JDK/JRE. Go to control panel and uninstall java. 

We recommend that only the latest JDK be installed. Although it is possible to install multiple versions of JDK / JRE simultaneously.

Step 1: Install Java

Install Java in your system if not installed. To Check Java is already installed in your system or not, Follow below steps

1.      Press Window + R keys 

2.      Type cmd & hit Enter.

3.      In Command prompt: Type “java -version” and Enter.

4.      If the Java is already installed in your system, it returns the java version (as seen below). If not, it shows as invalid command.

windows java commands

How to Download/install Java JDK

1. Go to L-ink. Click on JDK Download for Java JDK download.
2. Download Java JDK version as per your system configurations (32 bit or 64 bit).
3. Once the Java JDK download is complete, run the exe for install JDK. Click Next
4. Place this file here: C:\Program Files\Java 
5. Follow the onscreen instructions in succeeding installation steps.
6. Once you install Java in windows, click Close.
7. Now, as mentioned in step1, check JAVA version in cmd window.

IntelliJ Idea with Bitbucket Configuration

     By the end of this article, you will be able to create a Bitbucket repository and Integrate it with IntelliJ IDE. We’ll see the first time set up process and latter processes. So let’s dive into it.

What is a Repository?

In software development, a repository is a central file storage location. It is used by version control systems to store multiple versions of files. This may include multiple source code files, as well as other resources used by the program. Branches are used to store new versions of the program.

What is GIT?

Git is a free and open-source distributed version control system designed to handle everything from small to very large projects with speed and efficiency. I have created a git repository and explained step by step in detail in my last post, you can check it out here — link

What is Bitbucket?

Bitbucket belongs to “Code Collaboration and Version Control” category, while Git can be primarily classified under “Version Control System”.

Bitbucket is a Git repository management solution designed for professional teams. It gives you a central place to manage git repositories, collaborate on your source code, and guide you through the development flow. It provides awesome features that include: Access control to restrict access to your source code.

Is Bitbucket free?

Yes! Bitbucket is free for individuals and small teams with up to 5 users, with unlimited public and private repositories. You also get 1 GB file storage for LFS and 50 build minutes to get started with Pipelines. You share build minutes and storage with all users in your workspace.

How to create a Bitbucket Repository?

Create a bitbucket repo. Go to https://bitbucket.org/ and create a repository by clicking on + symbol in the left pane of the Bitbucket home page.


Select the Repository under CREATE options.


Fill out the below details like Workspace, Project name, Repository Name, Access level, Description, Language, and then click on Create Repository.


You have created a bitbucket repository. Now copy the git clone URL and start putting your local code inside our new repository.


Here I’m assuming that you have your local code which you want to push on bitbucket so that others can also contribute to that code. I have written an article, where I have created the Rest assured framework in Eclipse from scratch and pushed it to GIT. You can copy that same framework if you don’t have a local code handy.

Here is that article: rest-assured-framework-from-scratch-including-git-repository-integration-for-continous-integration

Here is the repository: https://github.com/yourname/rest_AssuredFramework

In this article, I’m gonna be using IntelliJ for IDE. IntelliJ IDEA is a cross-platform IDE that provides consistent experience on the Windows, macOS, and Linux operating systems. IntelliJ IDEA is available in the following editions: Community Edition is free and open-source, licensed under Apache 2.0.

Eclipse falls short in providing good assistance for code completion despite supporting many plugins. The default code compilation in IntelliJ is much faster and better, especially if you’re a newbie programmer — IntelliJ can help you improve your code.

Open IntelliJ and import your local project from File->Open.

Once you have imported the project in local IDE, let’s enable version control Integration so that we will be able to Push and Pull changes seamlessly in that project.

Go to VCS -> Enable Version Control Integration


Select Git and click OK.


What is API Documentation and how to setup in Swagger - an open source tool to automate the API document

We’re in the multi-platform economy, and APIs are the glue of the digital landscape. Any product can become a platform by providing methods for users to add services and functionalities on top of it. 

Catering to the developer is tricky. They’re analytical, precise, and are trying to solve important problems with your API. They want to understand how to use your API effectively, which is where API documentation comes into the picture. 

We will explore what it means to document your API, and why it’s important to have good API documentation.       

API documentation is a technical content deliverable, containing instructions about how to effectively use and integrate with an API. It’s a concise reference manual containing all the information required to work with the API, with details about the functions, classes, return types, arguments and more, supported by tutorials and examples.

Your API is a means to an end for the technical user, and they want to integrate as quickly as possible to move forward in their software development, meaning they should immediately understand the value and usage of your API.

1. Improved User Adoption

2. Increased Awareness

3. Saves Support Time and Costs

4. Easier Maintenance

Using Inspector, developers can easily call any API end-point, and see if the response is what was expected.

 Inspector’s simple UI is built to allow developers to test as quickly as possible without any learning curve or process change.

Swagger Tool – Automate the API document

Developers are constantly required to double check always

- If their APIs and end points work as intended during the development process itself. 

- They require a simple way to validate their work without breaking their existing development processes and frameworks

 Swagger Tools have helped automate the documentation process, which makes it easier for you, or your team, to maintain and update your documentation.

Why Swagger Tool ?

- This tool is a free, cloud based API testing and documentation generation tool.

- Swagger Inspector allows you to take any API and generate OpenAPI documentation automatically

- Swagger UI allows anyone — be it your development team or your end consumers — to visualize and interact with the API’s resources without having any of the implementation logic in place

- It’s automatically generated with the visual documentation making it easy for back end implementation and client side consumption.


How to Install Swagger Locally?

In this section, you will learn how to install Swagger Editor and Swagger UI in your operating system step by step.

Step 1: Download and Install NodeJs

Swagger Editor and Swagger are coded in Javascript language, therefore, to build and run it you have to use NodeJs. Go to the NodeJs official site and download the LTS (Stable) version according to your operating system. Install it in your operating system.

Step 2: Download the Swagger Editor and UI

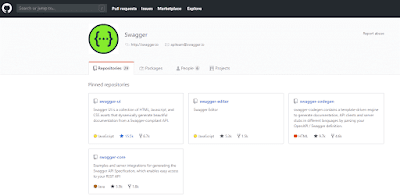
You can directly install the Swagger using the npm command but after installing it requires some other commands that you don’t remember. Therefore the best way is to install it using the source code. Go to the official Swagger GitHub page. There you will find the swagger-UI and swagger-editor links. Click on them and download the latest releases.

Swagger tool - API document
Official github Swagger 


Swagger Github Clone