What is API Documentation and how to setup in Swagger - an open source tool to automate the API document

We’re in the multi-platform economy, and APIs are the glue of the digital landscape. Any product can become a platform by providing methods for users to add services and functionalities on top of it. 

Catering to the developer is tricky. They’re analytical, precise, and are trying to solve important problems with your API. They want to understand how to use your API effectively, which is where API documentation comes into the picture. 

We will explore what it means to document your API, and why it’s important to have good API documentation.       

API documentation is a technical content deliverable, containing instructions about how to effectively use and integrate with an API. It’s a concise reference manual containing all the information required to work with the API, with details about the functions, classes, return types, arguments and more, supported by tutorials and examples.

Your API is a means to an end for the technical user, and they want to integrate as quickly as possible to move forward in their software development, meaning they should immediately understand the value and usage of your API.

1. Improved User Adoption

2. Increased Awareness

3. Saves Support Time and Costs

4. Easier Maintenance

Using Inspector, developers can easily call any API end-point, and see if the response is what was expected.

 Inspector’s simple UI is built to allow developers to test as quickly as possible without any learning curve or process change.

Swagger Tool – Automate the API document

Developers are constantly required to double check always

- If their APIs and end points work as intended during the development process itself. 

- They require a simple way to validate their work without breaking their existing development processes and frameworks

 Swagger Tools have helped automate the documentation process, which makes it easier for you, or your team, to maintain and update your documentation.

Why Swagger Tool ?

- This tool is a free, cloud based API testing and documentation generation tool.

- Swagger Inspector allows you to take any API and generate OpenAPI documentation automatically

- Swagger UI allows anyone — be it your development team or your end consumers — to visualize and interact with the API’s resources without having any of the implementation logic in place

- It’s automatically generated with the visual documentation making it easy for back end implementation and client side consumption.


How to Install Swagger Locally?

In this section, you will learn how to install Swagger Editor and Swagger UI in your operating system step by step.

Step 1: Download and Install NodeJs

Swagger Editor and Swagger are coded in Javascript language, therefore, to build and run it you have to use NodeJs. Go to the NodeJs official site and download the LTS (Stable) version according to your operating system. Install it in your operating system.

Step 2: Download the Swagger Editor and UI

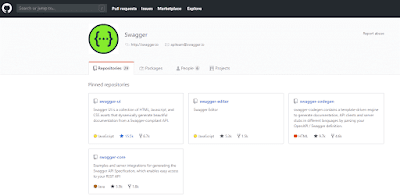
You can directly install the Swagger using the npm command but after installing it requires some other commands that you don’t remember. Therefore the best way is to install it using the source code. Go to the official Swagger GitHub page. There you will find the swagger-UI and swagger-editor links. Click on them and download the latest releases.
Swagger tool - API document
Official github Swagger 


Swagger Github Clone

TestNG Top 10 Interview Questions and Answers

TestNG Top 10 Interview Questions with Answers


 1. What is the sequence of execution of the annotations in TestNG?

Ans : annotations in order from

Before Suite method

Before Test method

Before Class method

Before Method

After Method

After Class method

After Test method

2. Can you arrange the below <testng.xml> tags from parent to child?

<test>

<suite>

<class>

<methods>

<classes>

Ans : Correct order

<suite>

<test>

<classes>

<class>

<methods>


3. How to run test cases in parallel using TestNG?

Ans : parallel = tests/methods/classes


4. In TestNG I have some test’s Test1-Test2-Test3-Test4- Test5. I want to run my execution order is Test5-Test1-Test3-Test2-Test4. How do you set the execution order?

Ans : By priority

@Test (priority=1) in Test5 

@Test (priority=2) in Test1 and continues...


5. If a test method failed, then its dependent method will

Ans : Never execute

How to install Jmeter in windows create request and get response for API testing

Install Jmeter JMeter is Java desktop application, it requires a JVM(Java Virtual Machine) .

Download and install the latest version of Java SE Development Kit.


After installation Go to terminal & check java runtime environment is installed successfully by entering a command java -version


After installation Go to terminal & check java runtime environment is installed successfully by entering a command java -version


If You dont get output for the given command then reinstall the JRE.

Download JMeter here(https://archive.apache.org/dist/jmeter/binaries/) by selecting the required version
Install apache-jmeter-5.4.1 version.

Unzip the zip file where You want the directory to be placed.

Install Jmeter Windows
Install Jmeter in Windows

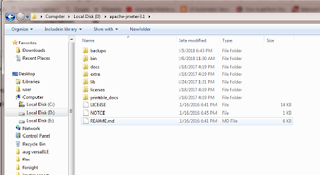
After unzipping you can see the folders inside the directory 

/bin: contains JMeter script file for starting JMeter
/docs: JMeter documentation files
/extras: ant related extra files
/lib/: contains the required Java library for JMeter
/lib/ext: contains the core jar files for JMeter and the protocols
/lib/junit: Junit library used for JMeter

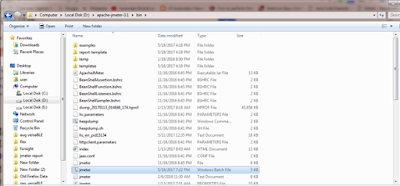
Go to the bin folder

You can check the folder for the jmeter batch file which You can open for windows but for linux ,select .sh file.

Install Jmeter in Windows

While launching You can see the exe file running on the background

Jmeter Performance testing and its types click here Performance and Load testing using Jmeter

Performance Testing, its types and using Jmeter with example, response codes and report

 Performance Testing

Types of Performance Testing

  • Load Testing

  • Stress Testing

  • Volume Testing

  • Capacity Testing

  • Spike Testing

  • Scalability Testing

Load: Testing speed of the system while increasing the load gradually  till the customer expected number.

Stress: Testing speed of the system while increasing/reducing the  load on the system to check any where its breaking.

Volume: Check how much volumes of data is able to handle by the  system.

Performance Testing process

Why load testing?

It evaluates the stability, speed or capacity of the system or component through response time in the application.